IndigoMuse Knits
Showing posts with label indigomuse original patterns. Show all posts

Friday, December 11, 2009

The Cheeky Little Monkeys pattern is available


After a very long wait, the Cheeky Little Monkeys pattern is now available. Visit - Cheeky Little Monkeys - for more information or to purchase. Don't have a Ravelry account? You can click this link - HERE - to purchase the pattern.

Details:

Needle - US 9/5.5 mm

Yarn - Brown Sheep Lanaloft Worsted in dark brown and white

Pattern techniques - include i-cord, increases, decreases, picking up stitches and felting. Pattern includes directions for both knitting flat AND in the round.

Approximate finished size after felting: 7”

Thanks for all of the comments and monkey love you've shown my little monkeys. There will be more monkey madness in the near future. Stay tuned! Have a fab weekend!

Monday, November 23, 2009

Got Monkey?

For long time readers of this blog (does anyone read it anymore?), you may recall my love of all things monkey. Four or five years ago, my felted monkey, Zira travelled the globe and I even developed a smaller pattern that I named the Cheeky Little Monkeys. Well for a variety of reasons, I never wrote up the pattern for the Cheekys and forgot about them. Thanks to a good bit of monkey love that several of my family and friends share with me, I dusted off the pattern, rewrote parts of it and am about to release it and several holiday versions over the next couple of weeks. Here's a preview of the newly revised Cheeky Little Monkeys

Thinking Cheeky closeup Retouch

You can see more pictures on the workshop site - http://theindigomuse.ning.com . Check back for registration information since I'm planning on developing an online workshop for these little fellows since there are so very many tips and tricks that I can't adequately describe in print. Patterns will be available through the site and Ravelry. Keep your eyes peeled :)

In other news, I've been busy filming/developing online knitting workshops and writing up patterns. Not much personal knitting happening except for Knitspots beautiful Leafprints wrist warmers and I'm actually knitting them out of the recommended yarn - Great Northern Yarns Mink/Cashmere (heavenly stuff). I did have a fab weekend away from the guys last weekend with my Maryland peeps Heather, Ei and Donna. You can read more on H's blog HERE. My Grandma has been in the hospital for almost two weeks after cardiac arrest a couple of weeks ago. Please add her to your prayer list. Poor thing had to spend her 87th birthday on Saturday in the hospital :( We are blessed because this is only the second time in her life that she's been in the hospital and she's actually doing very well. She's in rehab now to get her left arm back up to full capacity so she can go home.

Here's hoping that Thanksgiving is low key and relaxing for everyone.

Monday, June 29, 2009

Belated Blogiversary Celebration

Whoops! I missed the actual date by a few weeks. Needless to say, the beginning of the month was a blur but things are finally starting to settle down. So June 6, 2004 was the first time I posted in Bloglandia and that first post brought me headlong into the wonderful world of knitting, spinning and the people who inhabit it. I've made some wonderful "real" world friends, learned advance techniques, gotten tips for practically everything and tripped into spinning, dyeing and most recently weaving.

Speaking of weaving, here are a few pics of my first "real" planned project - a wrap - off the loom. Twas a success!

New weaving project on the loom

Jubilee Woven Wrap

Finished Woven Jubilee Wrap

Jubilee Wrap and me

So how am I celebrating my blogiversary? With a little happy dance and another first - I'm PUBLISHED!!! I've been waiting and waiting for my copy of Feltique to arrive from the publisher and it finally arrived.


It just didn't feel real until I had it in my hot little hands. Guess what's on the first page of the book? One of my little felted fortune cookies - SQUEEEE!

Felted Fortune Cookie - Feltique pattern

The fortune cookie pattern is on page 99.

Felted Fortune Cookies - Feltique Pattern

I also wrote a pattern for a felted floppy flyer (pretty much a felted frisbee but because of copyright issues, we couldn't call it that) that's on page 105.

Floppy Flying Disk - Feltique pattern

Feltique is FABULOUS! I love the variety of felting techniques that you can find in this one book and how visually appealing it is. I love books that not only show you the finished product but also shows you how to construct the project. This book is one that I will carefully study and toy with for years to come. I'm so very honored to have been asked to be a part of this beautiful book.

I can't begin to tell you how many hours Nikola and Brookelynn worked with me to tweek the pattern, mailing samples back and forth and fine tuning the technical info. Now multiply that times 18 different fiber artists. That takes dedication. The entire process took nearly two years from start to finish. I must say that I'll never pick up a knitting/craft book and look at it the same way again, knowing now how much time, blood, sweat and tears goes into every picture and project.

If you want to see more of Feltique, please visit the website or check out the Craftzine feature that Brookelynn did on several of the contributors (I'm featured HERE).

Thanks for letting me have a little virtual party here on my blog. My family and non-knitting friends don't "get" it. I'd kinda hoped that being published might validate my craft but they still think I'm on the nutty side with regards to fiber arts. Oh well, guess I'm in good company :)

Tuesday, July 22, 2008

Fancy Schmancy Messenger Bag

Thanks for all of your kind comments regarding our trip to Playa del Carmen. The kids and I love traveling (King Thing kinda does but prefers spend his days holding the sand down in Norfolk) and hope to do more in the coming years. I still can't get over how blue the water is. I just close my eyes and imagine it over and over and over again.

So back to the real world. I can't complain. I believe that the mountains of SW Virginia are gorgeous in the spring and summer. Everything is so green and I love hearing the peaceful chirping of the buggies and froggies (as long as they keep their distance) at night. I'm sad that the summer is already half gone. As much as I love the fall, I'm cringing at the thought of cold weather - brrrrrr.

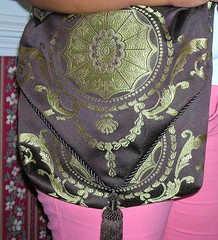
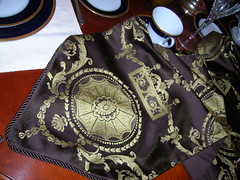
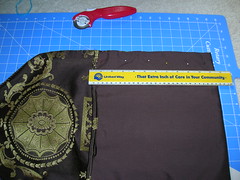
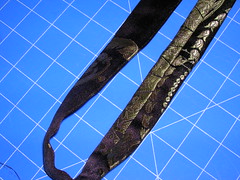
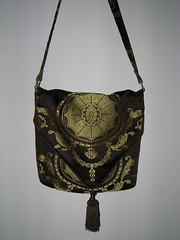
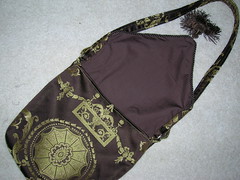
My sewing machine has been buzzing with activity since a dear friend (Thanks TM!) gave me the Simply Sublime Bags last week. I've enjoyed repurposing fiber and fabrics over the last few years and this book certainly feeds into that addiction. However, I initially had a tough time finding good materials to make some of the stuff from the book so I improvised using what I could find which was a $5 tablerunner at Ross. Scroll down if you want to see the Tute for the Fancy Schmancy Messenger Bag.

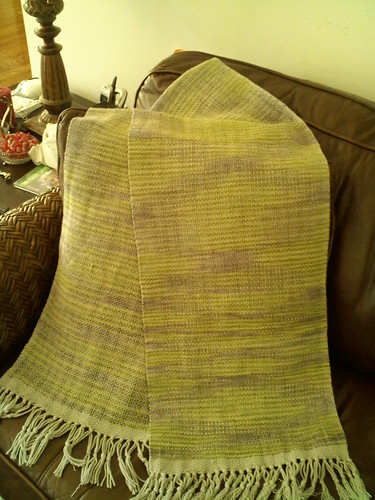
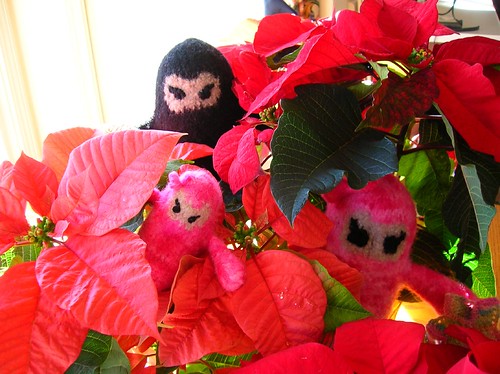
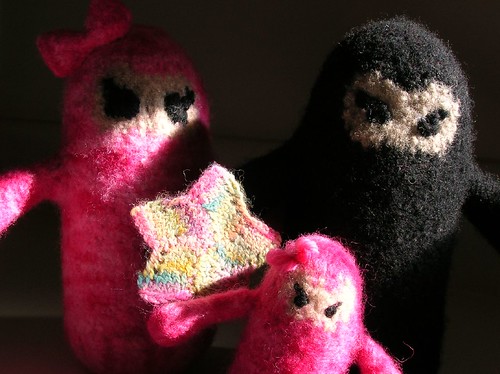
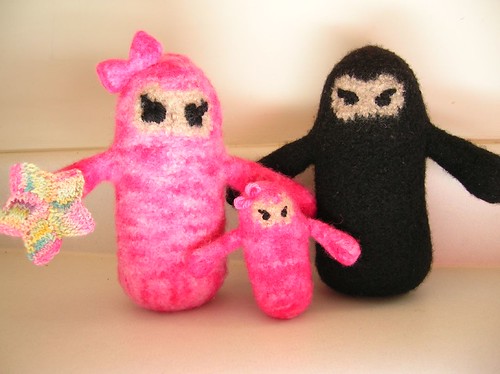
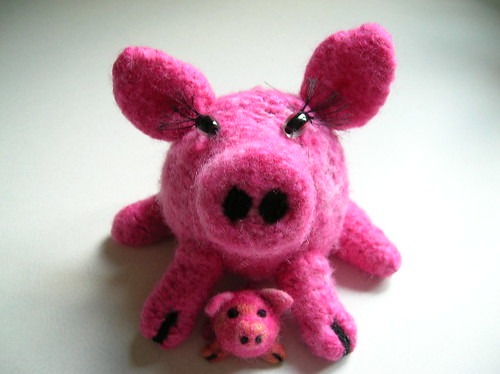
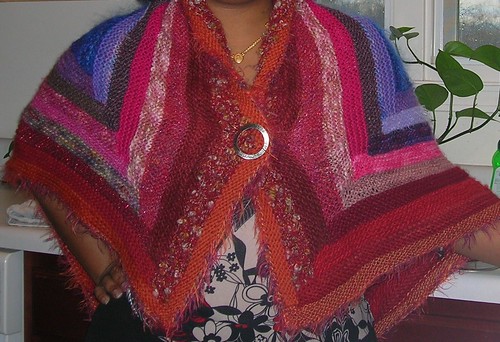
No need to worry. I HAVE been knitting, spinning and even dipping into the dyepot. I'll flash those pictures in another post.

Fancy Schmancy Messenger Bag Tutorial
Making a messenger bag with a tablerunner (15)

I was inspired by the new Simply Sublime Bags book to make a messenger bag from a $5 tablerunner I scored on a recent shopping trip. I decided to photograph the process, in case I wanted to replicate it and am happy to share it with others who might want to make their own bag. The great thing about making this bag from a tablerunner is that its already lined. You could easily whip up a bag and use it the same day!

Please be kind with your comments as I'm still fumbling my way through sewing terms and techniques (I KNOW knitting but have never really understood all of the sewing jargon even though my crafty adventures began with sewing when I was four). If there are any glaring mistakes, please drop me a line at indigomuse AT verizon DOT net so that I can correct them for everyone's benefit. If you visit the Fancy Schmancy Messenger Bag Flickr set, I've added notes to many of the photos to help with the process. Finally, send me photos or links to your bags if you decide to make one using this tute. I'd love to see how they turn out. Enjoy!

Materials:
1 90" x 14" tablerunner
Coordinating thread
Fray check (optional)
2 rectangular metal D-rings (optional)
Magnetic closure (optional)

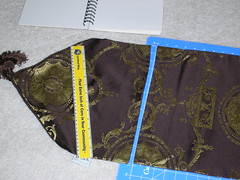
1.) Cut runner in half and put one piece aside to be used for the straps (and perhaps make another little bag).

Making a messenger bag with a tablerunner (1) Making a messenger bag with a tablerunner (2)

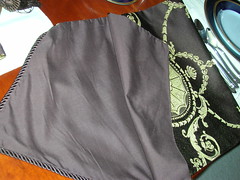
2.) Using 1/4" seam and RS facing, finish the cut edge.

Making a messenger bag with a tablerunner (4)

3.) RS tog, fold fabric in half (measurement from bottom to finished edge is 11 1/2"). Pin sides together and using 1/2" seam, stitch closed, backtacking ends.

Making a messenger bag with a tablerunner (5)

4.) Flatten corners of bottom to points (WS facing). Draw 2 1/2" line perpendicular to side seam and 1" from the corner point. Sew on line, backtacking ends.

Making a messenger bag with a tablerunner (6)

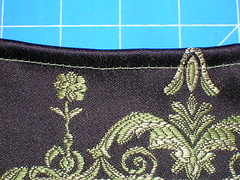
5.) Turn bag RS out and fold edges of flap in 1/2". Whipstitch into place, taking care to stitch through the lining only.

Making a messenger bag with a tablerunner (7)

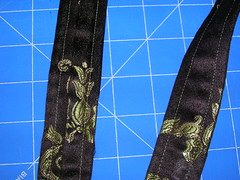
6.) Cut 2 22" x 3 1/2" straps from other section of runner.

Making a messenger bag with a tablerunner (3) Making a messenger bag with a tablerunner (8)

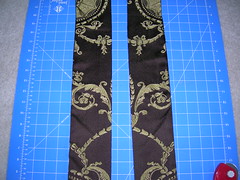
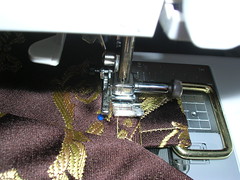
7.) RS facing and using 1/2" seam, stitch two of the short ends together. Press open seam and top stitch on each side. Fold strip in half lengthwise. RS facing, pin sides together and sew the length of the strap using 1/2" seam. Backtack ends.

Making a messenger bag with a tablerunner (9) Making a messenger bag with a tablerunner (10)

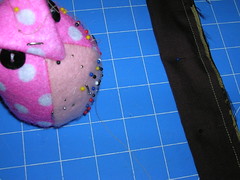
8.) Turn tube inside out, press flat and top stitch edges using 1/2" seam. Serge or finish ends of tube with zigzag stitch and apply fray check (optional).

Making a messenger bag with a tablerunner (11) Making a messenger bag with a tablerunner (12)

9.) Using remaining fabric, cut piece measuring 7" x 3 1/2". Fold in half lengthwise and stitch as for strap. Cut finished piece in half and finish edges with zigzag stitch and fray check (optional).

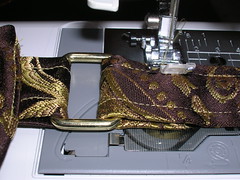
10.) Fold one of the short strap pieces in half (RS facing) over one side of a d-ring and sew to one side of bag top. Reinforce with by top stitching 1/8" from edge. Repeat with other side.

Making a messenger bag with a tablerunner (13)

11.) Fold 2" section of one end of the strap (RS facing) over the other side of the d-ring and sew 1" from the folded end. Reinforce by top stitching 1/4" from edge. Repeat with other side, taking care not to twist the strap.

Making a messenger bag with a tablerunner (14)

12) Admire your finished bag!

Making a messenger bag with a tablerunner (16) Making a messenger bag with a tablerunner (17)

Mods:

* To give your bag more shape, turn runner inside out (before step 2) and cut fusible interfacing the shape of the runner. Iron onto WS of the fabric (not onto the liner) per manufacturer's directions and trim, if needed. Continue from step two.

* Omit steps 4 and 5 for a flat bag

* Omit steps 9 and 10 and simply sew the straps directly to the body of the bag.

* Add a magnetic closure or snap to your bag to secure flap.

***This pattern is for personal use and may not be used commercially without the express written permission of Tanya Brooks.

Friday, March 21, 2008

Happy Spring - Sneak peak at a new pattern

Happy Spring everyone! I finally was able to log into Blogger this morning after many tries yesterday and write this post. Anyone else have trouble with Flickr and Blogger yesterday? Anyhoo, I've been stashing this pattern since August. Now that spring has finally arrived, I can give you a preview of my little flower friends.

Introducing the first of Las Florecitas - Rosa

Florecita Rosa with Sweet Pea in Hat

Florecitas are palm sized flower dolls. Their arms are willowy leaves and their faces are modelled on real flowers. They are designed to sit firmly on surfaces. Suggested yarns include Manos, Malabrigo, Rio de la Plata and other kettle dyed, chunky weight yarns. Rosa is shown with Baby Sweet Pea who will be included as part of an accessories pattern.

(Scroll down for additional photos)

I plan to release several more of the Florecitas throughout the Spring. The pattern will be available through Ravelry but I'm still on the waiting list to add a storefront so it will be a bit longer before you can purchase it. I'd rather give Ravelry the percentage of sales than Lulu or Payloadz so I appreciate your patience. From what I understand, you will not have to be a member of Ravelry to purchase a pattern through them.

I have so many wonderful test knitters to thank for fine tuning this pattern. I'll send them mad props when I post about the pattern going live. In the meantime, enjoy the warmer weather, the longer days and the beauty of the emerging world this wondrous Spring. And Happy Easter, too!


Florecita Rosa - closeup

Florecita Rosa - Body

Florecitas - Rosa (side view)

Tuesday, December 04, 2007

Wrist Therapy Wraps

Thanks for your sweet comments on the Knitjas. I'm still tweaking the pattern and hope to have it up soon. As with Chichi and hopefully all future patterns, I'm going to give a portion of the proceeds to charity. Its not much but I certainly want to use my powers to do some good in the world if possible. I'm thinking that the Knitjas will help out Heifer's Kids 2 Kids program or perhaps investing through Kiva. Any other suggestions? I'm all ears.

I've made the Handmade Holiday pledge this year even though I haven't gotten around to putting the badge on my blog. However, after nearly killing myself the past few Christmases with pain inducing, frantic, last minute knitting, I'm going to use my crafting skills to primarily sew my gifts this year. So I've arranged my assembly schedule over the next couple of weeks and hope to give you some ideas for fun last minute handmade gifts.

First up, thanks to the crafty divas at SewMamaSew, wrist therapy wraps.
I used their idea for Rice therapy bags and tweaked the pattern so that I could make them into wrist wraps. I admit that I had a selfish motivation to make these because my wrists have been bothering me as of late from some very tedious knitting and its hard to keep something flat like the traditional cold packs wrapped around your wrist.
They have velcro to help them stay put and a homemade hot/cold herbal insert that was a blast to make. I'll update this post with a tutorial and more details when I have more time. I know some knitter friends of mine who will be getting these for holiday gifts (sorry to spoil the surprise). Perfect for crafters, seniors or anyone who has aching body parts.
Happy holiday crafting everyone!

Friday, November 30, 2007

Knit a Ninja (Knitja)

I planned to take a couple of shots of my poinsettas this morning when I spied something hiding in the leaves...

Ninja Family hiding in the poinsettas

Why, its a family of ninja! They hopped out of the flowers. Bowed graciously...

Ninja family bowing

And quickly retreated to the shadows...

Ninja family in the shadows

Coming SOON! Knit a Ninja pattern for Pink ninja, black ninja and little minja (mini ninja).

Ninja family

You know you want to knit one...

Black and Pink Ninja

Monday, August 06, 2007

I'm published

Edited to add: Sereknity is located in the Crystal Springs area of Roanoke (sandwiched between Famous Anthony's and the Post Office in the old Flappers location).

Trinity (the log cabin triangle) made it into the Summer issue of For the Love of Yarn. I'm so excited!

If you're local, I'm teaching a Trinity class this fall at Sereknity. Stop by the store during the grand opening this Friday and Saturday for more information.

Got two original patterns fresh off the needles (if you've seen them, please don't spoil the surprise). After some test knitting (Anyone? Bueller?), I'll have them available here. The creativity is flowing like hot lava these days. Yippie!

Monday, April 30, 2007

Last day before the Chichi prize drawing

Today is the last day to purchase a Chichi pattern and have your name entered into the prize drawing. I'll announce the winners later this week. If you knit Chichi, send me a photo. I'd love to see how your piggie turned out. Thank for your continued support of this Heifer project.

Monday, March 26, 2007

A pig, Heifer, prizes and a new pattern

First, the pig. Introducing Chichi, the felted pig...

Chichi and mini Chichi

Mom to the little needle felted piggie I made to celebrate Chinese New Year earlier this year. Many thanks to La (email me, I have a free pattern for you) who suggested that I name the little piggie Chicharon (Chicharon is Spanish for fried pork rind). With that inspiration, I settled on the nickname "Chichi". So many fun names were submitted but this one was just perfect.

Chichi is my first (drumroll please) published IndigoMuse original pattern. I'm so proud of how she turned out. Not only is Chichi a whimsical pattern but she also offers a sampling of intermediate techniques making it a delightfully fun skillbuilder pattern.

However, other than periodic donations, I've never felt like I made much of an impact with my knitting which is in sharp contrast to the non-profit work I'm engaged in as part of my job. That all changes with Chichi and is where the "Heifer" comes in. 50% of the net profits from Chichi will support the global efforts of Heifer International. Specifically, Chichi will provide the gift of (hopefully) several pigs in the coming months for deserving families. Heifer is an organization near and dear to my heart because recipients become donors through their "teach a man to fish" philosophy. I'm sure that many of you are familiar with Heifer but if you aren't, please take a minute to visit their site and read about the incredible work that they are engaged in.

Did someone say PRIZES?!? Why yes I did. So far, I have this loverly skein of handspun merino/silk. Its 50 yards of worsted weight fushia yarn. Zira is bathing in the remaining 3 oz which is just enough for another 100 yards or so that I'll also spin up to be given away. Its a beautiful fiber just perfect for a lux version of Chichi, wrist warmers, a baby hat - imagine the possibilities. You are automatically entered into the drawing for these yarns (and more) when you purchase the Chichi pattern between now and April 30th - just in time for you to make something PINK for Project Spectrum! The drawing will be held on May 1st. Purchase the pattern, send me an email with "Chichi drawing" in the subject and you're on your way to winning these goodies.


And so by clicking below, you can purchase the pattern. Chichi is a Pdf. download that is emailed to you once you have completed your purchase (You will need Adobe Acrobat 5.0 or later to open the file). Thanks for your support of this worthwhile project. Enjoy!


Chichi

Chichi
© Tanya Brooks 2007
* For non-commercial use only. Wholesale/retail inquiries,
email indigomuse(at)verizon(dot)net


Yarn:
Manos de Uruguay, Malabrigo, Rio de la plata or other kettle dyed chunky yarn


Needles:
1 set US 10.5 (6.5 mm) double-point needles


Gauge (unfelted):
3.5 sts/20 rows = 4" stockinette stitch


Finished Measurements:
Body - 9.5" circumference
Ears - 1.5"
Legs - 2"
Nose - 1"
Tail - 5"


$3.95


Chichi - Upclose and personal Chichi - side view


Effective March 2008, a flat rate of $1 per pattern sold will be donated to Heifer projects. Donations will be made quarterly. Thank you for your continued support!

Tuesday, February 13, 2007

Trinity - the log cabin triangle

Trinity - the log cabin triangle throw
Trinity - the log cabin triangle as a throw

Trinity - the log cabin triangle

Some of you who visit my blog vs. a feed, may have seen this triangular fun pop up in my flickr photo set in the left column earlier this year. Inspired by all of the Mason-Dixon Log Cabin squares I saw last spring, I decided to try my hand at developing a log cabin triangle. I finished the larger triangle/shawl in early summer o6, just in time not get to use it very much. With the colder weather of late January and early February, it has gotten lots of use by family and friends alike. For whatever reason, I've had pattern publishing anxiety - one of the things I hope to get past this year - and didn't have the confidence to publish it until now. If you choose to knit one (or several) triangles, please let me know of any edits that you might suggest and I'll share them on my blog. Or better yet, join the Trinity Flickr Group and discuss the pattern and post pictures of your creations there.

So consider Trinity an early Valentine's Day present. I hope that you enjoy the pattern and I look forward to seeing triangular spawn on the internets.

Trinity Shawl
Trinity - the log cabin triangle worn as a shawl


Trinity

Trinity is the close relative of the basic Log Cabin square. It is constructed of a base triangle and trapezoid shaped strips. Make multitudes of triangles and stitch together in ways only limited by your imagination. A giant single triangle is suitable for a small throw, shoulder wrap or baby blanket. Felt smaller ones and make potholders. Get wild and knit several smaller triangles - and perhaps (((gasp))) even log cabin squares - together. Geometry and knitting are a match made in heaven!

Materials:
* Odd balls of yarn (for the sample, I used worsted weight natural fiber yarns)
* Appropriate size needles depending on what is recommended for the weight of the yarn(s) you plan to use (for both of the samples, I used Size US 10.5 Denise Needles)
* Tapestry needle
* Tape measure
* Crochet hook (optional)

Gauge: will vary based on yarn and needles used

Notes:

* When using acrylic and fiber blend yarns, keep in mind that they will block differently than natural fibers. It is also worth noting that some natural fibers block differently than others. Be sure to test fibers to see if they bleed especially if you plan to use many different colors in one project.

* You can use any weight of yarn for the body of the throw. However, I recommend using a sturdy yarn for the base triangle.

* Using needles a size or two larger than the recommended needle for the weight of the yarn, will give your project a slightly airy look. If you choose to mix weights of yarn, experiment with doubling the yarn and/or knitting fewer or more rows to achieve the desired width in strip for each section.

* You can preserve your sanity by weaving the loose ends of the yarn in on each row as you’re knitting vs. weaving in five thousand ends when you’re finished.

* You can leave the sts “live” after finishing each row (in lieu of binding off) by using a circular needle the circumference of the triangle or by slipping the live sts onto a piece of yarn. I used my Denise needles and changed the cords as the circumference expanded. If you plan to make a giant triangle, it would be worth it to invest in a 60” cord (for the Denises or 60” circular needle). However, binding off does tend to provide some structure for each side of the triangle, especially if you are using lighter weight yarns. If possible swatch using each technique before you invest too much time in a larger project.

* If you choose to BO each strip, its important to BO loosely.

Directions:

Small Base Triangle

Row 1: CO 12 sts
Row 2: K
Row 3: K2tog, K to last 2 sts, K2tog
Rows 4 – 5: K
Repeat rows 3 – 5 until 2 sts remain. K2tog and BO.

Large Base Triangle

Row 1: CO 16 sts
Row 2: K
Row 3: K2tog, K to last 2 sts, K2tog
Rows 4 – 5: K
Repeat rows 3 – 5 until 2 sts remain. K2tog and BO.

(follow directions below for both sizes of base triangles. The directions for the larger triangle are in parentheses.)

Side One of Triangle

Row 1 – (With new yarn) At base of triangle, pick up 13 (17) sts.
Row 2 – Kf&b 1st st, k to last st, kf&b
Row 3 – K
Repeat rows 2 and 3, inc. 1st and last stitch on every other row until strip is desired width. (For the sample, there were 3 garter st ridges after binding off.) Bind off. If you choose to keep the sts live, make sure that working needle is on the left side of your knitting. You will be rotating the triangle to the left to pick up sts on the 2nd side of the triangle.

Side Two of Triangle

Row 1 - (with new yarn) Begin picking up sts for side two beginning with sides of the strip you just knit. Pick up sts between the garter sts ridges totaling the same as what you picked up on side one (the base of the triangle).
Row 2 – Kf&b 1st st, k to last st, kf&b
Row 3 – K
Repeat rows 2 and 3, inc. 1st and last stitch on every other row until strip is desired width. Bind off. If you choose to keep the sts live, make sure that working needle is on the left side of your knitting. You will be rotating the triangle to the left to pick up sts on the 3rd side of the triangle.

Side Three of Triangle

Row 1 – (with new yarn) Begin picking up sts for side three beginning with sides of the second strip you just knit, the third side of the triangle, and the sides of the first strip you knit. This side will be slightly longer than the other two sides.
Row 2 – Kf&b 1st st, k to last st, kf&b
Row 3 – K

Repeat rows 2 and 3, inc. 1st and last stitch on every other row until strip is desired width.. Bind off. If you choose to keep the sts live, make sure that working needle is on the left side of your knitting. You will be rotating the triangle to the left to pick up sts on the 1st side of the triangle.

Continue with directions for side three of triangle for all sides until triangle is the desired size (if you are using circulars, you will be picking up the sts from the sides of the strips on either side and will be knitting the sts from the needle on the sts in the center). Use a crochet hook, three needle bind off or tapestry needle to connect/sew the triangles together.

If knitting one large triangle, use a decorative yarn and crochet or knit a chain of stitches around the entire project to finish the edges. Experiment with a picot trim, tassels or other decorative edging for even more fun. Enjoy!


All contents are copyright Tanya Brooks 2007. This pattern is for personal use only and may not be used commercially, distributed or copied whole or in part without express written permission from Tanya Brooks.